
HomeMake a ribbon covered browband for your pony!
Latest News
Make a ribbon covered browband for your pony!
Here's how to make your very own ribbon covered browband!
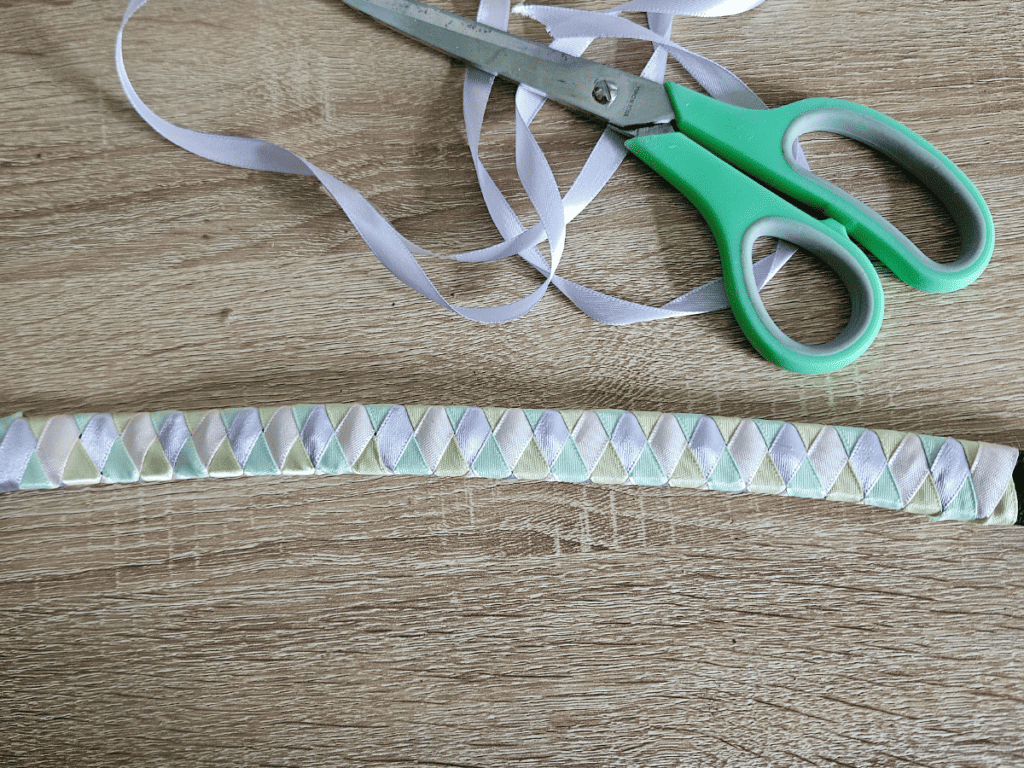
What you’ll need:
- Scissors
- Glue
- Browband
- Up to four different coloured ribbons – we’ve used 10mm wide ribbon, 2m long
Remember – Always ask an adult to help when using scissors.
Step one
Separate your four lengths of ribbon into two pairs. One pair of ribbon will be in colours that will make up the middle diamonds of the browband. The other pair of ribbon will be the colours that are on the outer edge of the browband.
Step two
Glue each pair of ribbon together at right angles. Then lay the two pairs of ribbon on top of one another to make an X. You can use a clip to keep them in place while they dry.
Step three
Place the ribbon behind the browband with the join closest to the end of the browband. The pair of ribbon colours on the left-hand side will make up the inner-diamonds of the pattern. If it helps to keep it secure, you can use a bit of tape, or a clip, to keep the ribbon in place.
Step four
To start the pattern, bring the top right ribbon over the front of the browband and lay it across the ribbon opposite. Then take the top left ribbon and bring it across the browband and lay it over the ribbon opposite.
Step five
Take the top ribbon which is on the right-hand side and wrap it around the back of the browband. Then take the remaining ribbon from the right-hand side and wrap it across the front of the browband. All ribbon lengths are now on the left side!
Step six
Out of the four ribbon you have on the left-hand side, move the top ribbon out of the way and take the ribbon sitting behind it across the front of the browband to the right-hand side.
Step seven
Now take the top ribbon (the one you moved out of the way in step six) and slip it between the two ribbons on the left-hand side and take it around the back of the browband to lie on the right-hand side. You should now have two ribbons on the left-hand side, and two on the right-hand side.
TOP TIP
Keep your ribbon nice and tight!
Step eight
Repeat the steps from step five to step seven until you reach the end of your browband.
TOP TIP
You can use clips to help keep your ribbon pattern in place as you move down the browband.
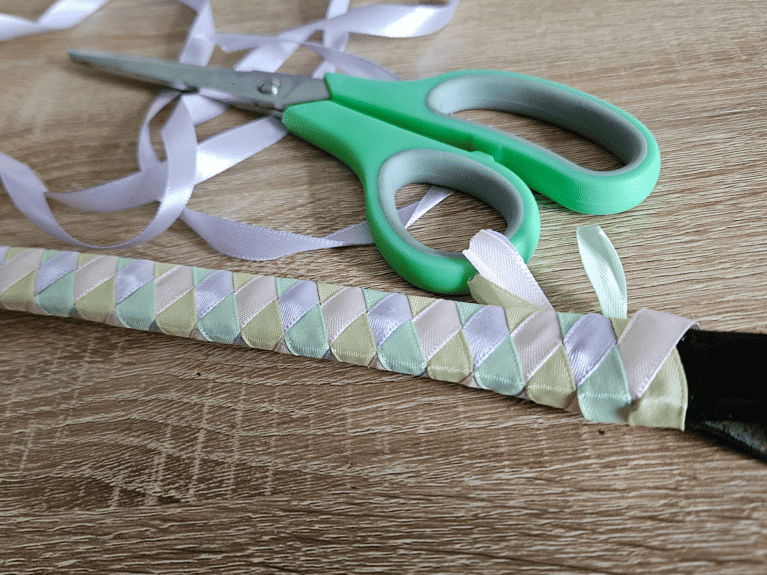
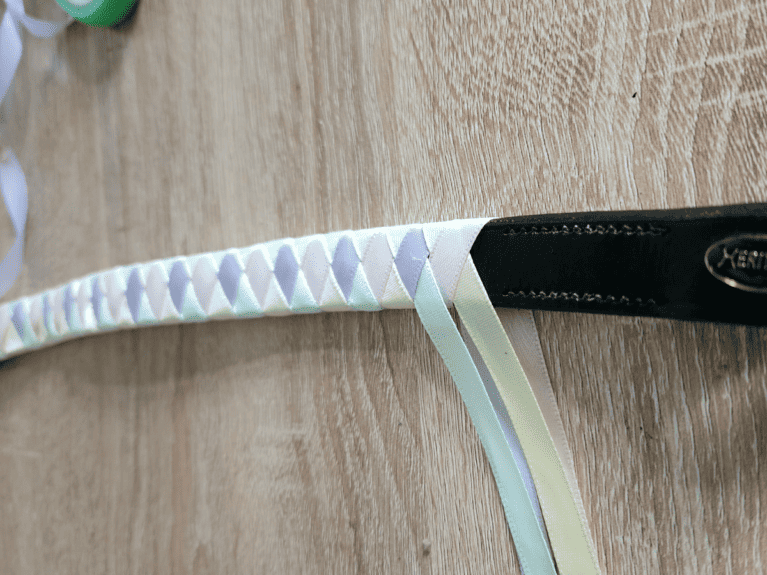
Step nine
Cut any excess of ribbon and secure it by gluing, sewing, or taping it in place.
Your Comments
Related Articles


Leave a Reply
You must be logged in to post a comment.